Druid External Live Chat
The Druid External Live Chat is a unified contact center that enables support teams to efficiently manage and respond to customer interactions across multiple AI Agents from a single interface.
When an organization operates multiple AI Agents—whether serving different customer segments (such as individuals versus business entities), handling different business operations, or deployed across separate tenant configurations—the support department typically needs to access each agent live chat system independently. This creates operational inefficiency and a fragmented customer support experience.
The Druid External Live Chat solves this challenge by providing a centralized hub where a support team can assist customers interacting with any deployed AI Agent in one place. Multiple AI Agents connect to a single Druid External Contact Center, allowing a helpdesk team to serve all customer conversations from a unified interface.
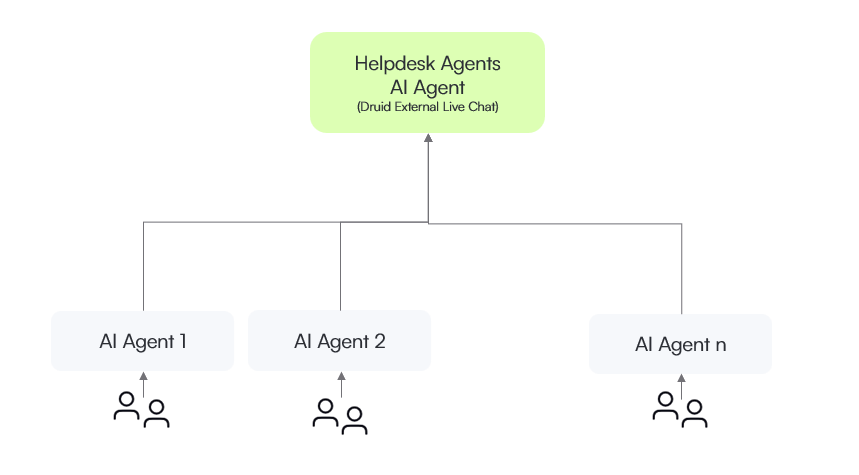
Each deployed AI Agent (1 through n) functions as a client AI Agent, while a dedicated AI Agent serves as the helpdesk AI Agent for helpdesk agents.
Configure Druid External Live Chat
The Helpdesk AI Agent acts as a live chat contact center application itself. Its dedicated purpose is to manage the live chat infrastructure:
- Host live chat operators
- Manage queues, working schedules, and conversation timers (waiting time, idle timeout, etc.)
- Allocate clients to available helpdesk agents
The helpdesk AI Agent must focus exclusively on live chat operations. It should not handle business logic from other domains such as healthcare, finance, insurance, retail, or any other industry-specific processes. Keep all business functionality in the client AI Agents.
To configure Druid External Live Chat, follow these steps:
- Create an AI Agent dedicated only to managing incoming live chat requests. For more information, see Creating AI Agents.
- Import the Live Chat Advanced solution from the Solution Library and configure the Live Chat settings and special flows. For more information, see Setting up Live Chat.
- Add queues and assign agents. For more information, see Live Chat With Multiple Queues.
- Import the Addon for DRUID External Live Chat solution from the Solution Library. This solution contains a system flow that triggers when a live chat request comes to the Helpdesk AI Agent. The flow places the client in the queue and captures the metadata sent by the client AI Agent (if any).
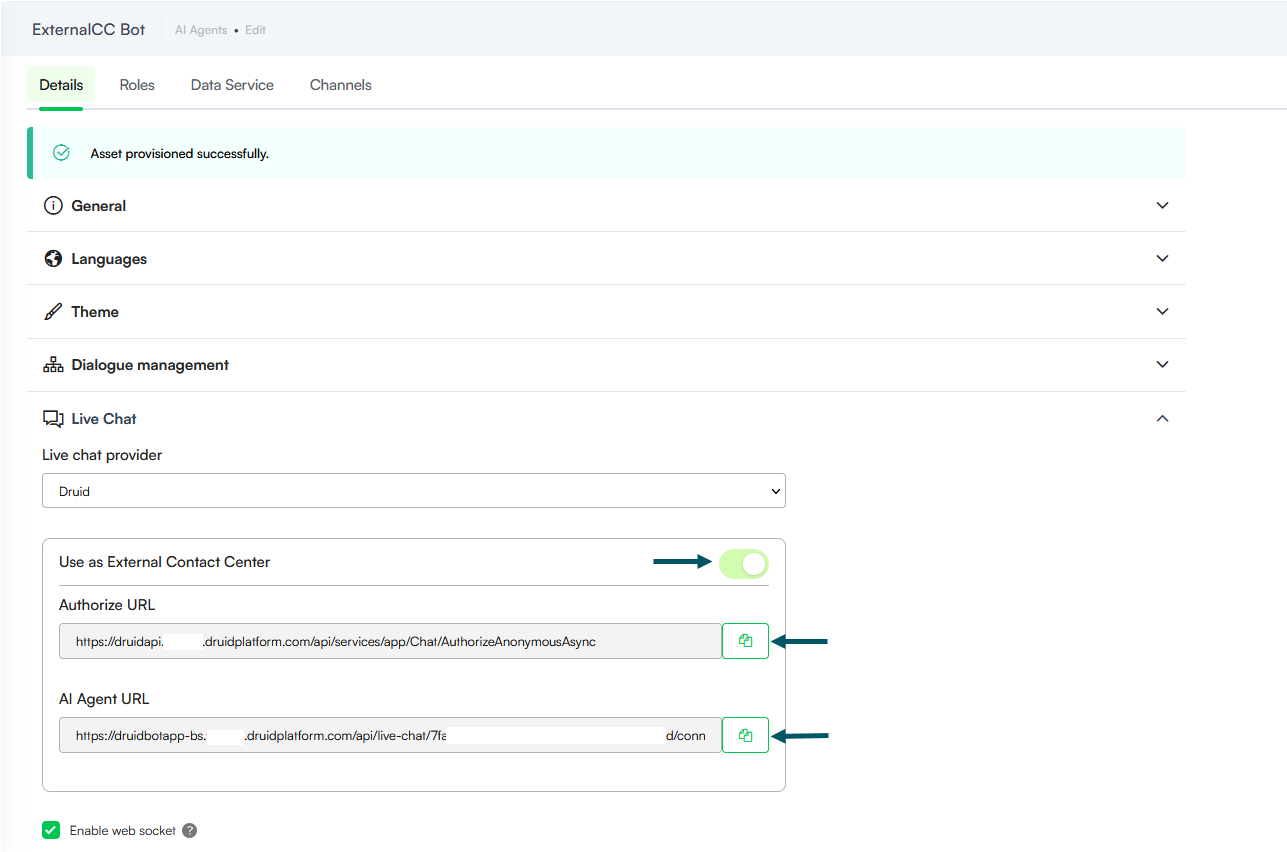
- Go to the AI Agent details page, Live Chat section.
- Tap on the Use as External Contact Center toggle.
- Copy the Authorize URL and the AI Agent URL and save them. You will need them to configure the AI Agents that will connect to this AI Agent dedicated for helpdesk agents.
Configure the client AI Agents
Follow this procedure to configure each of your client AI Agents:
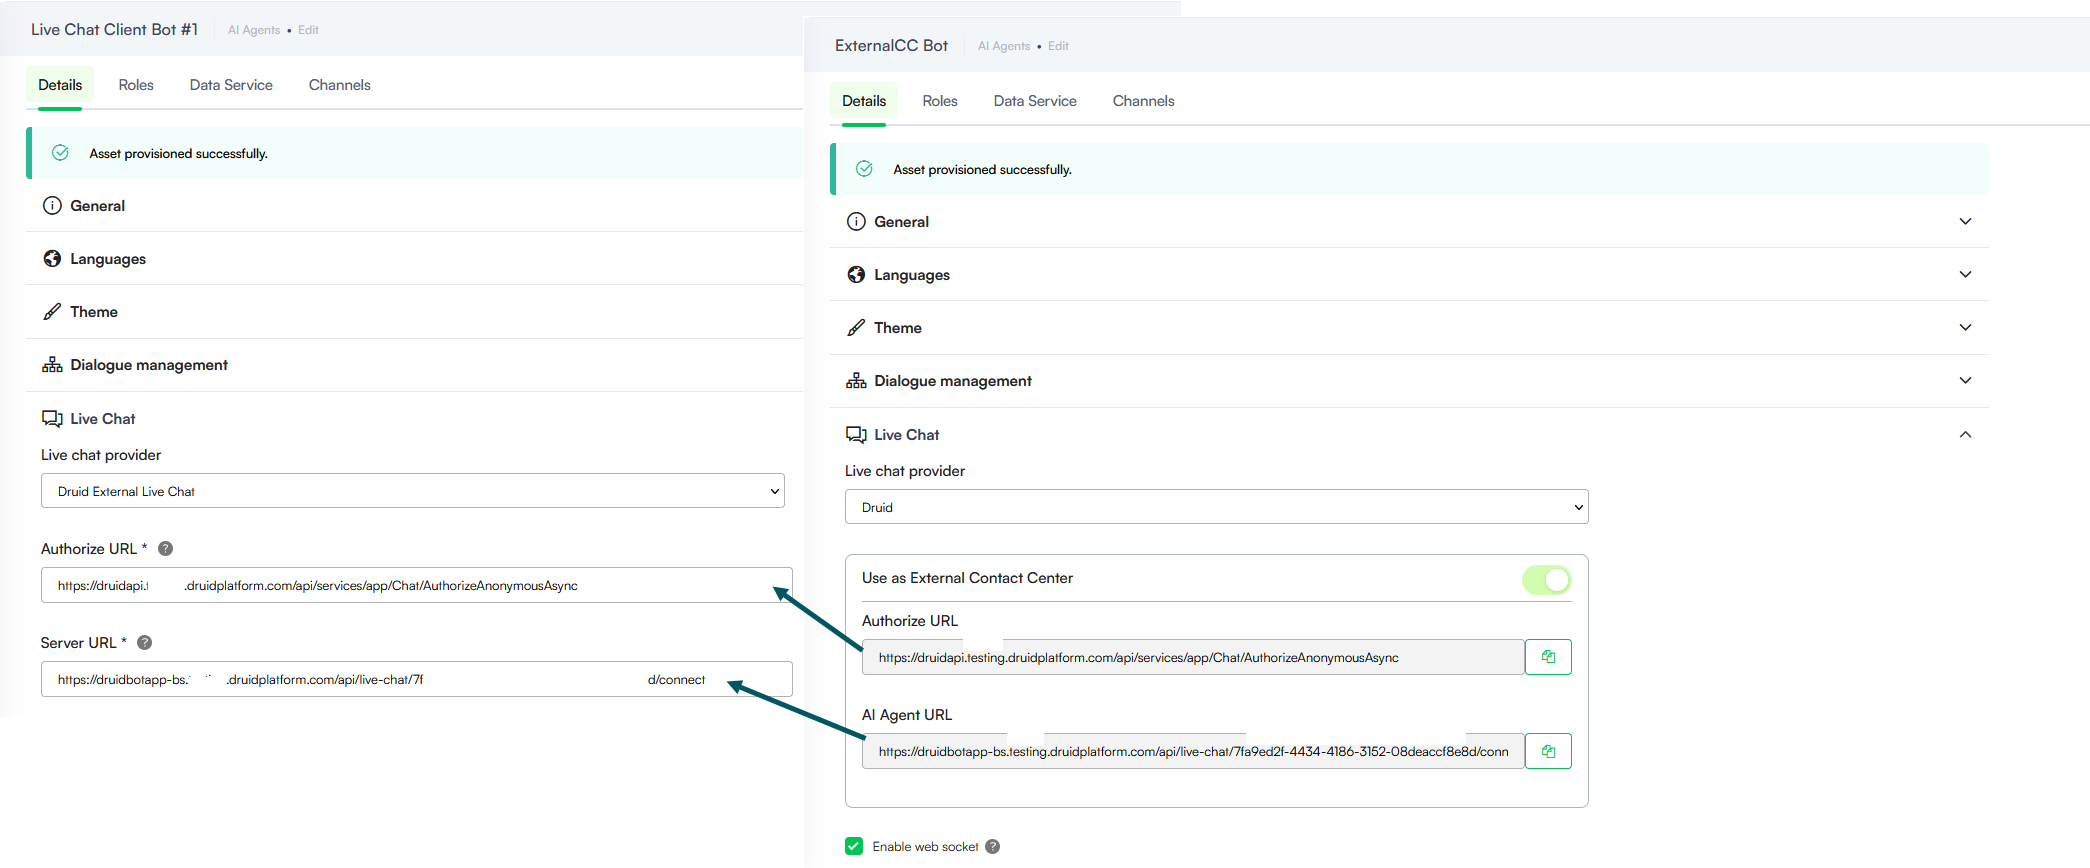
- Go to the AI Agent details page, Live Chat section.
- From the Live chat provider dropdown, select Druid External Live Chat.
- In the Authorize URL field, enter the value copied from the Helpdesk AI Agent.
- In the Server URL field, enter the AI Agent URL you copied from the Helpdesk AI Agent.
- Import the Live Chat Advanced solution from the Solution Library. You need this solution only to send metadata to the Helpdesk AI Agent and capture client feedback.
- From the Live chat client disconnected flow dropdown, select the dedicated flow that will trigger when the conversation ends. For example, create a flow to capture user feedback. Note that this is logged only on the client AI Agent and is not sent to or stored in the Helpdesk AI Agent.
Send the conversation transcript
To save the conversation transcript and make it available for helpdesk agents, on the client AI Agent, go to the live-chat-connect-to-agent flow, make the following settings:
- On the step where you call the internal action ConnectToHelpdeskAgent (Post Actions section), in the Pre Actions section, call the internal action GetConversationTranscript.
- On the ConnectToHelpdeskAgent internal action add the following:
- Save the step.
{
"SendConversationTranscript": true
}Send contact center parameters
On the client AI Agent, go to the flow live-chat-connect-to-agent, step S2 Connect to helpdesk agent and click on the ConnectToHelpdeskAgent internal action. Provide the desired parameters inside the ContactCenterParameters object in JSON format.
Example - Send Contact Center parameters
{
    "ContactCenterParameters": {
        "PhoneNumber": "0722111222",
        "Name": "John Doe",
        "email": "john.doe@druidai.com",
        "customProperty": "customValue",
        "QueueCode": "@queue",
        "subject": "Product inquiry",
        "botName": "[[ChatUser]].BotName"
    }
}
In this example, the following fields were defined in the [[QueryParams]] system entity on the helpdesk AI Agent:
- [[QueryParams]].PhoneNumber
- [[QueryParams]].email
- [[QueryParams]].customProperty
- [[QueryParams]].QueueCode
- [[QueryParams]].subject
- [[QueryParams]].botName